If you work from home or run your own business, it’s not always easy to remember to send your invoices out on time.
In this article you’ll see how to write a Google Script (VERY simple, don’t worry).
We’ll also show you how to do the same with a macro. A macro can nicely packages up your invoice and emails it out to any email address (or addresses) you like.
Step 1: Prep Your Monthly Invoice
If you don’t currently track your invoices using Google Sheets, you really should. Even if you’ve never programmed anything in your life.
Google Sheets is stored on the cloud, where you also have the power of Google scripts at your fingertips. Because of this, Google Sheets is far more “internet-enabled” than Excel is.
It doesn’t really matter how you format your invoice for this solution to work. Let’s take a few things that you should get organized before tackling your Google Script.
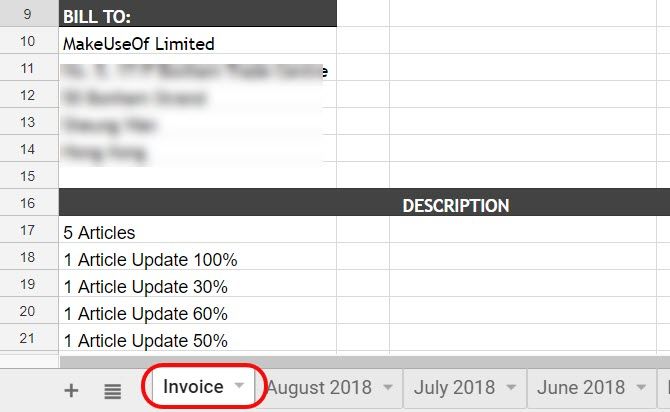
This isn’t complicated. All you need to do is make sure your current month’s sheet is always named the same. In my case I call it “Invoice”.
On the 1st of the month, the invoice is automatically sent. Then some time later during the first week, I just rename it to that month and year.
Then recreate the “Invoice” sheet and start logging for the current month again.
Step 2: Create the Google Script
To get into the Google Script editor from Google Sheets, just click on Tools in the menu. Then click Script editor.
It’s smart to rename the Project name to something you’ll remember later if you ever need to go back through your scripts and tweak it.
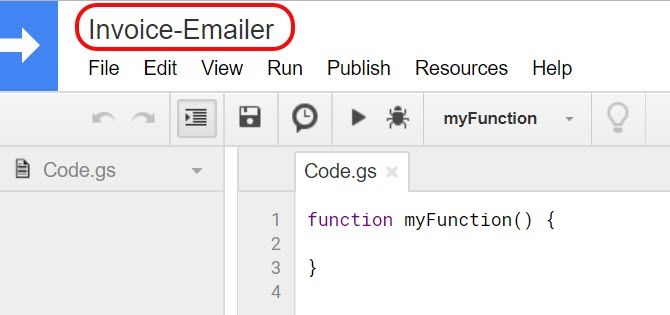
Next, paste in the following script.
function myFunction() {
  var ss = SpreadsheetApp.getActiveSpreadsheet();
  var filename = "Current Month " + ss.getName();
  var SendBook = ss.copy(filename);
  var ToUser = "xxxxx@gmail.com"
  MailApp.sendEmail({
    to: ToUser,
    subject: 'Here is my invoice for last month!',
    body: 'Hi! I have attached my invoice for this month. Thanks for the work, really appreciate it! -Ryan',
    attachments: [SendBook.getBlob().setName(filename)]
  });
}
We’ve covered the sendEmail function in the past if you’re interested in how that works.
Edit the right parts of that script so that it’s going to the correct email address. Make sure it uses the right name of the person you’re sending it to in the body as well.
To test that your script is working, fill out the “ToUser” text with your own email address.
Click on the Save disk icon in the menu to save the script. Next click on the Play icon (looks like a right arrow).
![]()
It’ll ask you to confirm authorization for the script to access your other Google data (like Gmail and Sheets).
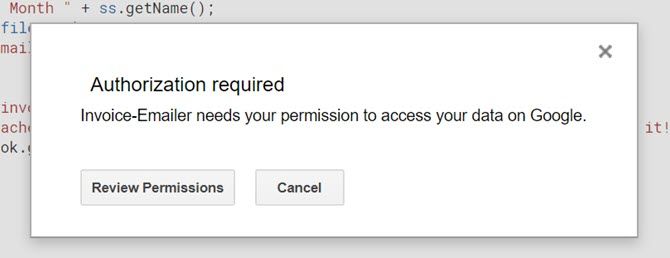
You might get a warning that the script is unsafe. This is only because you’re writing a custom script that Google hasn’t reviewed or authorized for wider use.
You can ignore this warning since you created the script and you know it’s safe.
If it runs properly, you should have received an email that looks like this:
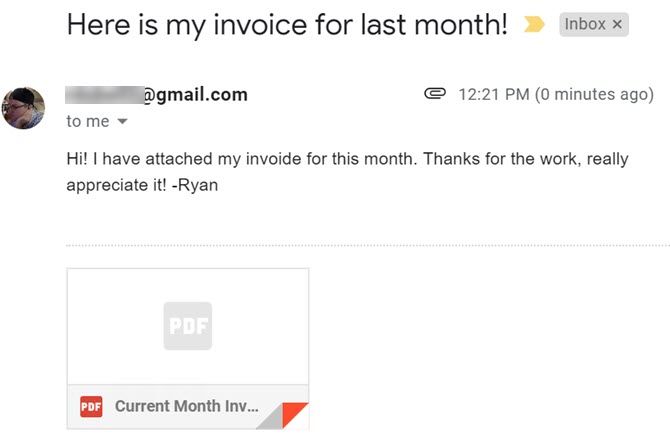
As you can see, the spreadsheet gets attached to the email as a PDF. This makes it really easy for the recipient to open and view it even if they don’t use Google Sheets.
Now we need to automate this so it runs on the 1st of every month.
Step 3: Automate Your Invoice Script
To automate your script, you need to create what’s called a “trigger”.
Go back to your Google Script, click Edit in the Menu, and choose Current project’s triggers.
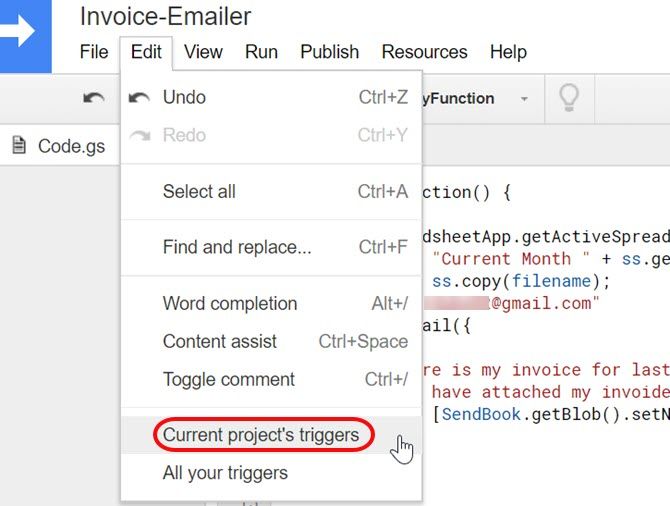
Since you haven’t created any triggers yet for this project, this will be blank.
You’ll see a blue link that reads “No triggers set up.” Click it.
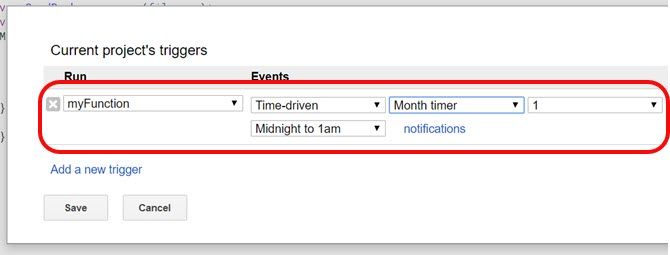
Choose Time-driven events, set the timer to Month timer, and leave the number at 1.
Once you click Save, Google Scripts will send off the PDF format of your invoice, via email, on the 1st of every month.
That’s all there is to it!
The important thing is just to make sure you keep your invoice well updated during the month. Make sure it’s finished and ready to go on the first day of the next month.
Step 4: Create a Macro
There is another non-programming approach you can take to accomplish the same thing as the script above: Google Sheets now includes a macros feature. Macros let you record a series of actions to accomplish a task. In this case, you’d first create the macro, and then trigger it the same way you triggered your Google Script.
First, in your Invoice Sheet, go to Tools > Macros, and select Record Macro.
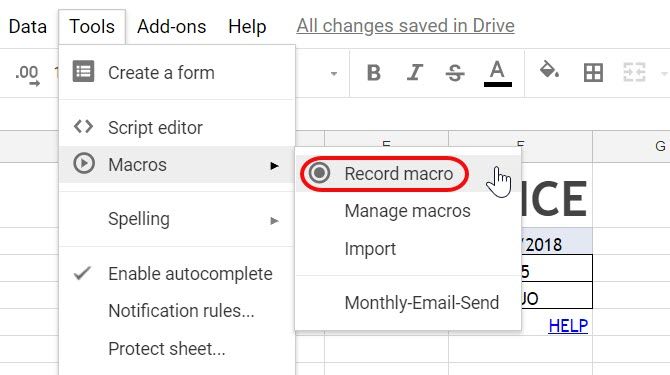
Next, just go through the normal steps of sending someone the sheet as a PDF attachment.
Go to File, and click Email as attachment.
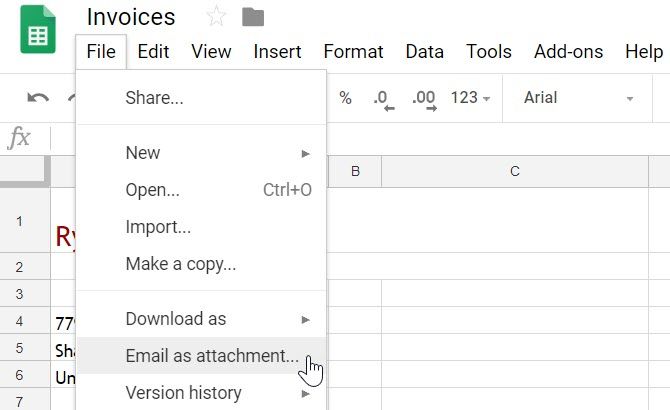
Then, fill out all of the form fields so the subject and body looks natural.
Then click Send.
On the “Recording new macro” pop-up, click on Save. This finishes the macro recording process. Give the macro a name you’ll remember, and click Save again.
You should have seen your test email arrive with the PDF attached.
Step 5: Automate the Macro
Now it’s time to automate the macro. You can trigger macros just like you trigger Google Scripts.
Go back into Tools and Script editor. Click on the macros.gs code.
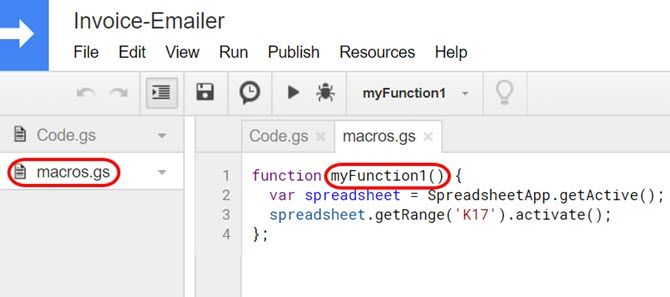
Make note of the name of the macro function. In the example above, the macro function name is myFunction1.
Now go into Edit, and Current project’s triggers.
This time, in the functions dropdown box, you’ll see the macro function in the list. Select it.
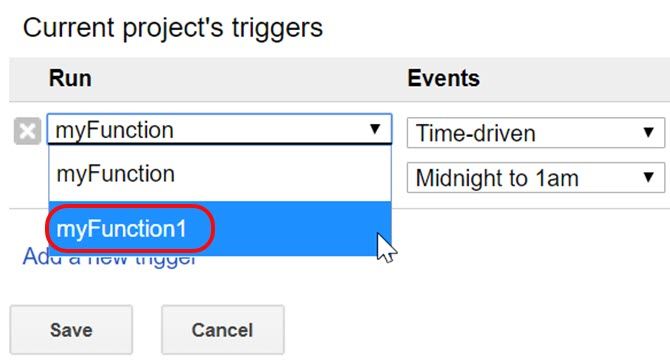
Then, just set up the rest of the trigger like you did above for the Google Script trigger.
Set Events to Time-driven. Choose Month timer. Leave the number at 1.

Now your recorded macro will run every month.
It will send out the Invoice sheet as a PDF to whatever email addresses you defined when you recorded the macro.
Automated Google Sheets Can Save Time
The triggers feature in Google Sheets is really the power behind this automation. It lets you automate all of those mundane tasks you do frequently, so that you can focus on more important things.
If you’re just getting started with Google Scripts, and you’d like to learn more, we’ve covered other examples of useful Google Scripts you can try right now.
Read the full article: How to Automatically Send Monthly Invoices From Google Sheets
Tidak ada komentar:
Posting Komentar